
We are taking a less strenuous approach to the whole business, however, and are settling ourselves in for major sessions of armchair athletics. To make ourselves as comfortable as possible I have been busy with my own contribution to the Olympic effort!
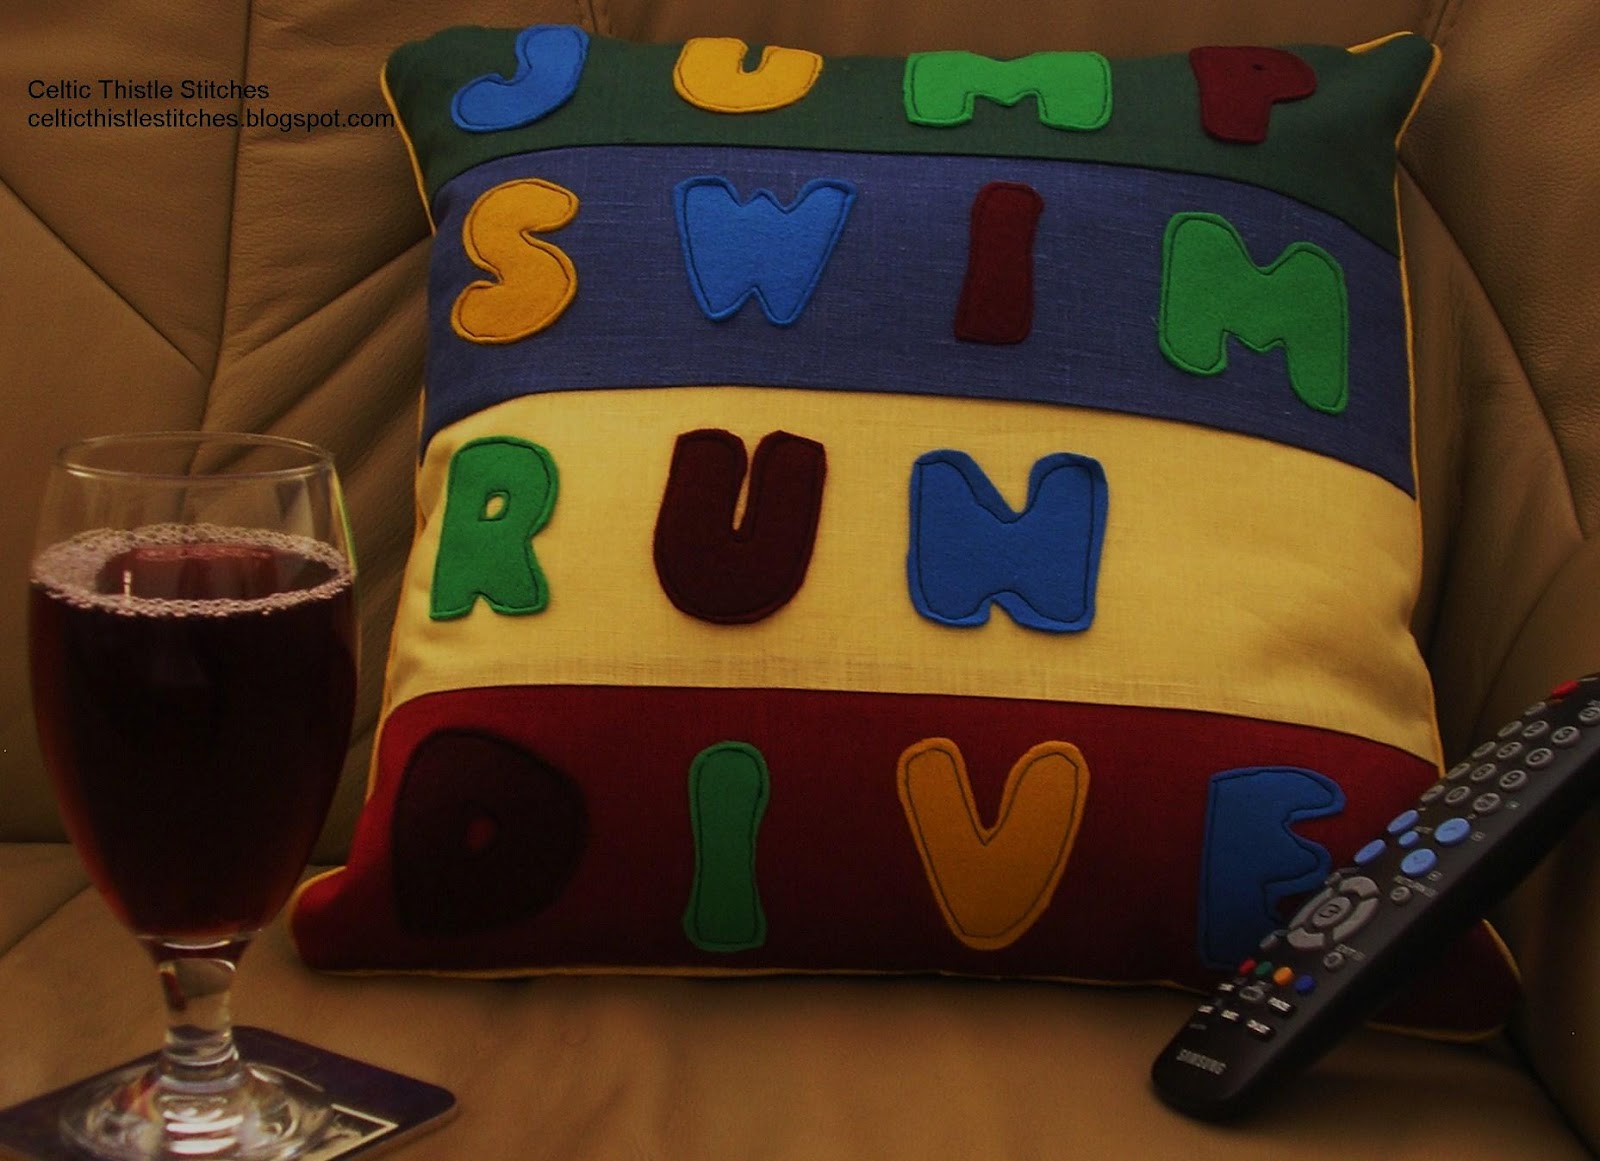
 This side is for the action
If you want to get yourself comfortable too here is what you will need to do.
To make a cover to fit a 16" / 40cm cushion inset you will need

2 pieces of fusible fleece 16" by !6"
Squares of felt in 4 different colours
Freezer paper sheets
1 zip 16"
2 yards covered piping cord. (you can buy this ready-made as I did or make your own with piping cord and bias tape)
piping cord foot for sewing machine (optional)
Seam allowances are 1/4" throughout
Step 1
Sew your 4 strips of material together lengthwise to make a 16.5" by 16.5" square. Iron one fusible fleece square to the back of your pieced square and the other fusible fleece square to the back of your 5th colour fabric square.Step 2
Trace or draw the letters for your applique on to the dull side of the freezer paper. For the small letters on the front of the cushion I used an alphabet template from here and drew the larger letters out freehand. Make sure that you reverse the letters so that they will be the right way round when you applique them.
Cut out the letter shapes and apply to the felt using a hot iron.
Arrange the letters to your satisfaction on the striped front and plain back of the cushion.

Once you are happy with the layout remove the freezer paper from the back of the letters and pin them to your cushion ready for applique.

Step 3
With the letters attached it is time to attach the piping. Leaving a length of piping free pin the covered piping cord to the outside of the cushion front matching up the raw edge of the piping with the raw edge of the cushion.

When you have pinned back to the beginning of the piping cord, unpick the seam for an inch or so at the unpinned end and cut the piping leaving a length of bias covering with no cord inside.

If you have a piping foot use this to stitch the piping to the cushion front, if not a zipper foot will do just as well.

Step 4
Measure your zip and shorten, if necessary, by hand-stitching over the zip teeth several times at the open end to create a new closure at the appropriate length. Attach the zip to the top raw edge of the cushion back right sides together, then repeat for the cushion front using the piping seam as your guide for the zipper seam.Step 5
OPEN THE ZIP HALFWAYI have lost count of the number of times I have forgotten to open the zip for the next step and believe me it is not easy to open a zip from the wrong side!
Pin the cushion front and back together right sides facing each other and stitch together from one zipper end, down the side, across the bottom and back up to the other zipper end.
Turn the cushion cover right sides out through the open zip.
Press the cushion cover and insert your cushion pad.
Grab the remote control, pour yourself something refreshing and sit back and enjoy :)
Well that is my plan.
May the best men and women win!
Let me know if you make one of these for the armchair athletes in your life. I can already see another one in the colours of my sons' rugby clubs with appropriate (clean!) phrases. Would love to see what you come up with.
Linking this up to TGIFF

LOVE it, Fiona!!! Such a fun pillow.
ReplyDeleteLove it, made me giggle :) found you through TGIF :)
ReplyDeleteA cute cushion and a tutorial - great work! Thanks for joining in TGIFF :)
ReplyDeleteLol, eejit ;o)
ReplyDeleteI'll be actually going to the rowing finals next Friday, although I could have worked it, I'm rather glad I'll actually get to see it (history has shown that working rowing events means you get to see bog all!)
Oh, I love the Sit. Your pillow made me smile.
ReplyDeleteSuper cushion, I love the sit on the back, brilliant!
ReplyDeleteLove it! Such a cute cushion. Loving the "Sit" side - too funny! Great project Fiona!
ReplyDeletedarn cute idea!
ReplyDeleteHi Fiona, I've featured your cushion today. Hope you were nice and comfortable for the opening ceremony...
ReplyDeletehttp://threadingmyway.blogspot.com/2012/07/threading-your-way-features_28.html
That's a cute cushion and thanks for sharing a great tutorial! Found you from Threading Your Way =)
ReplyDeleteLovely and cheerful! Enjoy the games, and thank you for the tutorial.
ReplyDeleteI'm all for an armchair olympics!!
ReplyDeleteGreat cushion!
Thanks Fiona, it was fun to do too!
DeleteWhat a fun and festive project! We love the Olympics!! Though, I must admit, I was sadly a bit underwhelmed by the opening ceremonies. Perhaps a festive pillow would have improved my outlook.
ReplyDeleteThat is a really funny cushion. Love it.
ReplyDeleteHello there, nice to meet you sorry I am late, great cushion, very appropriate! I hope your son is having fun at the Olympics. My sister worked for Coca Cola as part of the torch relay and she had a ball!
ReplyDeleteGreat idea, and some fab tutorials Fiona, thanks for sharing x
ReplyDelete