Thursday, 25 September 2014

New to Me in September

Welcome to another New to Me Link Party. September is the month to go back to school here in the UK, and traditionally time to sign up for evening classes to learn that language you promised yourself you would learn on your latest foreign holiday :)

So, it is the perfect time to reflect on everything you have tried that is New to You this month.

With wedding fever dominating my crafting for most of this month my New to Me activity has been somewhat muted.

I have, however, commissioned and received my first ever machine embroidery from the lovely Benta for these bridesmaid bags


I also tried out a new glue when making the bags, as I thought that I ought to give the recommended glue a whirl. 


The jury is out on whether this was a good move or not. I found that the glue went from wet enough to soak into the fabric to too dry to get a good adhesion so quickly that I found myself adding extra glue quite a lot. I used ordinary PVA glue the first time I made a bag with the clamshell frames and don't recall having a similar problem, but that might just be selective amnesia :) Will be interested to know what anyone else thinks.

Also New to Me this month, and hopefully my poor feet will have forgiven me (!) was attempting to walk and dance the night away in these beautiful but totally impractical shoes :)


So, now it is your turn to share all the fascinating things that you have been up to this month. As ever please help to spread the word by linking back to this post in your post and/or adding the blog button to your sidebar.

Grab button for Celtic Thistle Stitches


<div class="Celtic-Thistle-Stitches-button" style="width: 125px; margin: 0 auto;">
<a href="http://celticthistlestitches.blogspot.com" rel="nofollow">
<img src="https://blogger.googleusercontent.com/img/b/R29vZ2xl/AVvXsEgEjeUnrQPLNmW-4ESmelY-jw6xs1jBL5J9Jv7Fd7WhD217cWdzSpq8iQ2fNHOn5pCqsIKkjCVZVBxzgzSKcqNG8vDPRu-xFGPA-OE32ELHOgetwzRMvO7Xa8LTxKExx5Jr9pUe5-x0jII/s125/New%2520to%2520Me%25202014%2520graphic.jpg" alt="Celtic Thistle Stitches" width="125" height="125" />
</a>
</div>


Check out the other links and leave a comment along the way. The emphasis of this link party is to celebrate the trying of something new, whether it works out exactly as planned or not, so a little encouragement here and there would not go amiss! 

The link will remain open until 23.59GMT on September 30th, so you have plenty of time to try something new and link up and join the party :)


Friday, 19 September 2014

The end of the line

Well, it was a bit fraught but we got there in the end!


The final three bags were finished just in time for the wedding. The finish was so close I didn't have time to take a photo of the purse for the flower girl, but the rest of them are in the photo.


Wasn't this the perfect find in my stash for the interior of the bag made for the bride? Anyone would think I had been hoarding this especially :)

Phew! I am heading off for a well-earned break now!

Thursday, 18 September 2014

Ho, Ho, Ho and on We Sew September

Well, today is a pretty momentous day all round. My fellow Scots are heading to the polls to decide whether or not Scotland becomes an independent country.


It is also our son's wedding day, 

http://www.publicdomainpictures.net/view-image.php?image=474

But of course more importantly it is time for this month's Ho, Ho, Ho and on We Sew link up :)


If you are new to the party, let me fill you in on the details. Paula and I decided at the end of last year that Christmas 2014 was going to be different, this time round there would be no late-night sewing sessions or frantic last-minute dashes to the Post Office. This time we were going to work on Christmas and Holiday projects throughout the year so come December we would be so organised we wouldn't know what to do with ourselves :)

We decided to share our plans with our blogging friends and invite them to be organised too, with a monthly Link Party to provide a gentle nudge. As ever we have a lovely incentive for you to get crafting and linking and this time it is 20m of  this great Christmas ribbon from Plush Addict

Plush Addict Logo
Berisfords - Merry Christmas Red
Merry Christmas Red ribbon roll


The lucky winner of last month's Felt Ornaments pattern was Sheri at Sunshine in the Attic with her lovely Attic Windows quilt.


Now as you might imagine with a wedding in the offing, Christmas activity has been on the back burner a bit this month. However, I do have a timely tutorial to share with you for a Christmas-themed Home Decoration project. Never let it be said that I am letting you off the hook with getting you organised for the festivities this year!


This lampshade tutorial was originally written to meet a challenge hosted by the lovely Lynne at Lily's Quilts with materials supplied by Abakhan.

Fortuitously the project requires 2m of Christmas ribbon, so if you were the lucky winner of this month's giveaway you will at least have one idea of what to do with some of that lovely ribbon :)


It would never do for Santa to get lost on Christmas Eve, now would it? With this lampshade there is no chance of him missing his way.

To make your own guiding light you will need the following :


1 30cm Drum Lampshade Making Kit
1m Quilters Calico
2 Felt Squares - Dark Brown
1 Felt Square - Crimson
2m Owl and Snowflake Ribbon Ivory Red

In addition, you will need an A4 sheet of double-sided fusible web to attach the sleigh and reindeer to the lampshade fabric.
If you wish to add bells to the reindeer collars and sleigh you will also need a length of embroidery floss and 4 Jingle Bells. I had these in my stash already, but you can also find them here

The Lampshade Kit contains comprehensive instructions on putting together the lampshade as well as a link to a video tutorial, so I will concentrate on the embellishments that I added to the basic lampshade in this tutorial.


The first step in making your lampshade is to mark the dimensions of the backing fabric on the back of the calico. Before you proceed to the next stage in the kit instructions you will need to create and attach the felt reindeer and sleigh.


Draw out the sleigh and reindeer figures on the double-sided fusible web and then iron the web to the back of your red and brown felt squares. I used this image for Santa and his sleigh and the Sizzix Reindeer die 657246 to cut out my Reindeer, but the Santa image also comes with reindeer too, so you could use them instead. You will need 4 reindeer images and one Sleigh to complete the circle of the drum shade. Don't forget to reverse the images, you wouldn't want Santa to be flying through the skies backwards!


With your fabric right side up, and making sure that you keep within the marked lines on the back of the fabric, decide where to place your reindeer and sleigh. Once you are happy with the placement remove the backing paper from the felt cut-outs and fuse the figures to the calico fabric.


To attach the reins and bells (optional) using 6 strands of white embroidery floss stitch lines loosely from the sleigh to the first reindeer and then to each subsequent reindeer. If you are attaching the bells on the sleigh and reindeer collars you will need to take the embroidery floss behind the felt and thread the floss through the top of the bell and back through again then through to the back of the felt to firmly fasten the bell in place. Bring the floss back up at the neck edge and carry over loosely to the next reindeer to repeat the process. 


Fasten off after attaching the bell collar on the furthest reindeer from the sleigh.

Follow the kit instructions to attach the backing fabric to the calico shade. If you have added bells to the reindeer collars and sleigh, you will find it easier to attach the backing fabric up to each bell and then roll the fabric over the bell before continuing to the next bell, rather than attaching the backing in two stages as in the instructions.


Using the double-sided tape supplied in the kit, tape the lampshade rings and attach the lampshade fabric to the rings.


Tape around the bottom edge of the covered lampshade and attach the Owl and Snowflake ribbon to the edge of the shade. You will have enough ribbon to attach a border at the top edge of the shade too, but I chose not to do this as it would have been too close to the reindeer antlers on the highest reindeer!

Attach the shade to your light fitting, then sit back and wait for Santa and his reindeer to arrive :)


So now it is your turn to show and tell and share your Christmas makes. 


As ever we are grateful to our lovely and generous sponsors who have provided us with such great prizes for the Link Party.
Fluffy Sheep QuiltingRay Stitch HaberdasheryBackstitch


Quiet PlayQuilting Fabric at the Fat Quarter ShopPlush Addict Logo  Posie: Patterns and Kits to Stitch by Alicia Paulson


Tuesday, 16 September 2014

Getting a production line going

Well, the production of the bridesmaid bags has really stepped up a pace now! It feels like a mini-factory here in Celtic Thistle land.


The frames, which are from uhandbag are the same frames used in this bag.


The fabric for the bridesmaid bags is an ivory faux silk from Plush Addict . I also bought a Skinny Dips bundle in lilacs and purples from Plush Addict so that each of the bags would have a different fabric for the interior.


The icing on the cake though are the beautifully machine embroidered Gothic initials courtesy of the very talented Benta, who translated our vision into reality. 
I have never been so nervous, knowing that I only had one chance to get these bags right as not only did I not have enough material for second attempts, but I definitely didn't have time to get the initials embroidered again. No pressure there then! 

We are past the halfway stage now, four bags down only three to go!


Monday, 15 September 2014

Beginning production

Three years ago when our middle son married I volunteered to make bags for each of my daughter-in-law's bridesmaids, so when our eldest son got engaged last year naturally I volunteered to do the same again. The wedding is this week so you might imagine that I would have had the bags all done and dusted a long time ago, sadly you would be wrong! As is my usual, I have been working right up to the wire on these.

To get back into the swing of things, bag making wise, I decided that the first bag made should be the one requested by my daughter-in-law, who bought this frame and picked out some fabrics from my stash.


The fabric is a Kona solid, but I have no idea which one!

The interior fabric is Fox Field by Tula Pink and was perfect for the owner of this little chap :)


There was talk of having him as the ring bearer, but it was decided that he couldn't be trusted to keep focused on hopping down the aisle of the church when there was all that tempting greenery around :)

One down, only seven more to go!

Monday, 1 September 2014

Around the World Blog Hop

Last week I was tagged by Leanne in the Around the World Blog Hop, which is a global game of tag ricocheting around quilty blogland. If you haven't met Leanne before, she blogs at Devoted Quilter and is the brains behind the Spin Placemats pattern I tested recently.


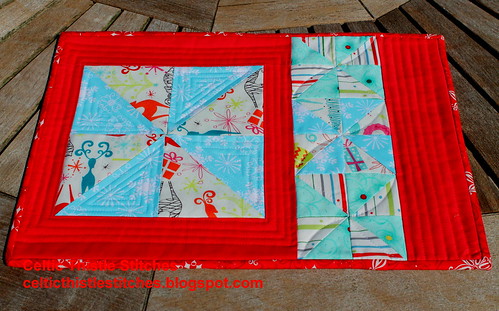
Spin Placemat

Like me, Leanne has three boys and claims to suffer from Quilters ADD, is it any wonder we connected :)

The purpose of the Blog Hop is to get to know quilty bloggers a little better by having them answer some questions about their stitching and blogging, so here goes.

1. What am I working on?

Well you know me, I am never working on just one thing, but at the moment the priority is bags! Our eldest son is getting married later this month and I volunteered to make bags for all five of the bridesmaids, and the bride and my daughter-in-law.

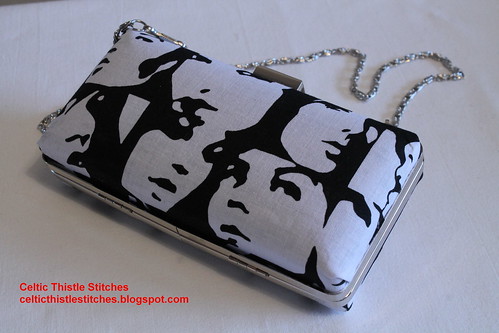
Clamshell with chain

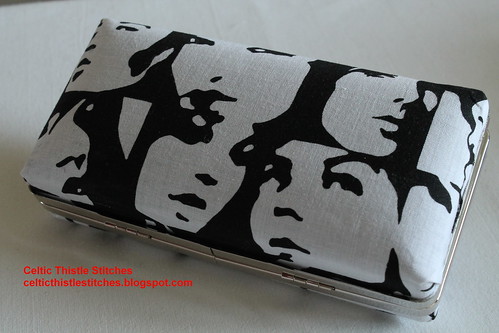
Fortunately for me there is very little sewing involved as they have all requested these clamshell clutches from u-handbag. The same cannot be said for my lovely blogging friend Benta, who has been tangling with medieval fonts to embroider the bridesmaids initials on the bag fabric! You can see her tale of the disappearing font here In case you are wondering the clutch above is one I made earlier, the bags for the bridesmaids will be ivory satin with embroidered initials!

2. How does my work differ from others of its genre? 

Well, I don't think that it does as I don't really have a genre to differ from. I like working with traditional fabrics like linen and Liberty in new ways, seen here in my Jewellery Roll project for Fat Quarterly.

Then again I like working with modern solids too, like the Binocular Bag for Sew Mama Sew

And more traditional patterns and techniques too!

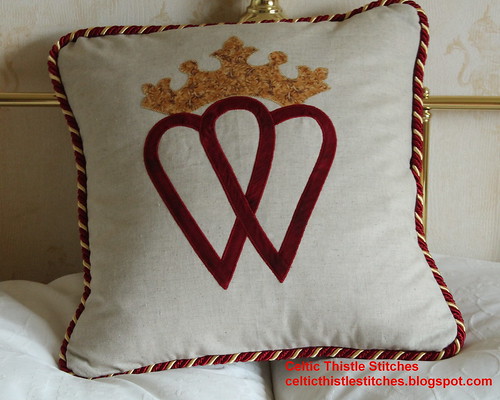
Luckenbooth Cushion front
So you can see my problem :)

3. Why do I write/create what I do? 

Well the answer to the writing part is easy. Living in a male-dominated household there are very few opportunities to extol the virtues of one fabric designer over another or share the joy of tracking down that last piece of a favourite fabric. Blogging is my way of connecting with like-minded individuals who recognise that Ty Pennington is a fabric designer not a striker in the Premier League!!

As to why I create, well that is easy to answer too. I love it, I always have. From stitching handmade gifts for teachers and Santa outfits for school plays, to now fulfilling requests for bags for daughters-in-law and cushions to brighten up a son's new flat, being able to make something that is personal and unique and to have the recipient like it just brightens up my day :)


4. How does my writing/creating process work?

Well given my butterfly attitude to projects I am sure you will not be surprised to read that my writing process is much the same. I am most definitely not a one project at a time girl, in fact I get a bit twitchy if I only have a couple of things on the go at any given moment. In my dreams I have blog posts neatly scheduled weeks in advance, but as I never know quite what I fancy doing from one day to the next, then you will not be surprised to hear that blog posts are usually very much down to sitting at the computer and typing.

The only exceptions to that are the monthly link parties, New to Me and Ho, Ho, Ho and on We Sew, where I do have to be a bit more disciplined as I live in terror of not having the party available on the right day of the month :)

Since our time in Latvia I have been inspired by all of the fascinating places that we have visited, and even now that we are back in the UK I am having fun finding new places to inspire me locally. So I am rarely out and about without a camera around my neck and I do find myself frequently thinking this or that would be an interesting item for a blog post. I am also constantly taking photos of potential quilt block or applique patterns and one of these years I will actually get around to doing something with them :)

So, that's enough about me now it is my turn to tag another lovely blogger for you to meet. 

Dittany, who blogs as Blue Moth has the most amazing EPP project going on as you can see!


She certainly has more patience than I will ever have, those pieces are tiny! Check out her post in the Around the World Blog Hop next Monday, September 8th.

Related Posts Plugin for WordPress, Blogger...