Hello and Welcome if you are visiting this blog for the first time as part of the
Let's Get Acquainted Blog Hop and welcome back if you are a regular reader.
Allow me to introduce myself, I am Fiona, a Scot (hence the blog title!) currently living in Riga, Latvia. I enjoy trying my hands at different crafts but recently I have been drawn more and more to quilting, mainly due to the inspiring blogs, Bees and Quilt and Sew a Longs that I have found in blogland.
Here are just some of the projects I have worked on since I started blogging!
I first encountered patchwork and quilting when I signed up for an evening class several years ago in the UK. The aim of the class was to make a bed-size quilt using QAYG. It perhaps tells you something about the class that all but one of the blocks are completed and still waiting to be put together into a quilt. It is on my to-do list for this year though, well actually finishing the last block is, not finishing the quilt!
Discovering blogs and particularly craft blogs opened up a whole new world for me, and suddenly I was encouraged to have another go at quilting, which leads me to my first blogging tip - Join in! I started this blog in January this year, and simultaneously signed up for Sew Happy Geek's Sampler
QAL, it was not only a great introduction to quilting, but also to other bloggers. The quilt from the QAL is in the middle of the second row in the mosaic above. Since then I have learnt to paper piece with
Katy, which resulted in the Circle of Geese and Log Cabin cushions above, and embraced Zakka-style in the
SAL, hence the tote bag and mug rugs above too!
The mosaic itself is my second blogging tip -
Big Huge Labs If you have been wondering how to put together a mosaic of all your projects, wonder no more! Access to the mosaic maker is free once you have registered and you can link your account to Flickr and Facebook accounts too.
As to quilting tips I can only repeat the join in tip, as I would definitely never have attempted paper-piecing without the support and inspiration of fellow bloggers.
My favourite quilting tool has to be my 6.5" and 12.5" rulers, the first is invaluable for trimming a 1/4" seam from paper-pieced patches and the second for squaring up blocks in the various BOM's I have joined.
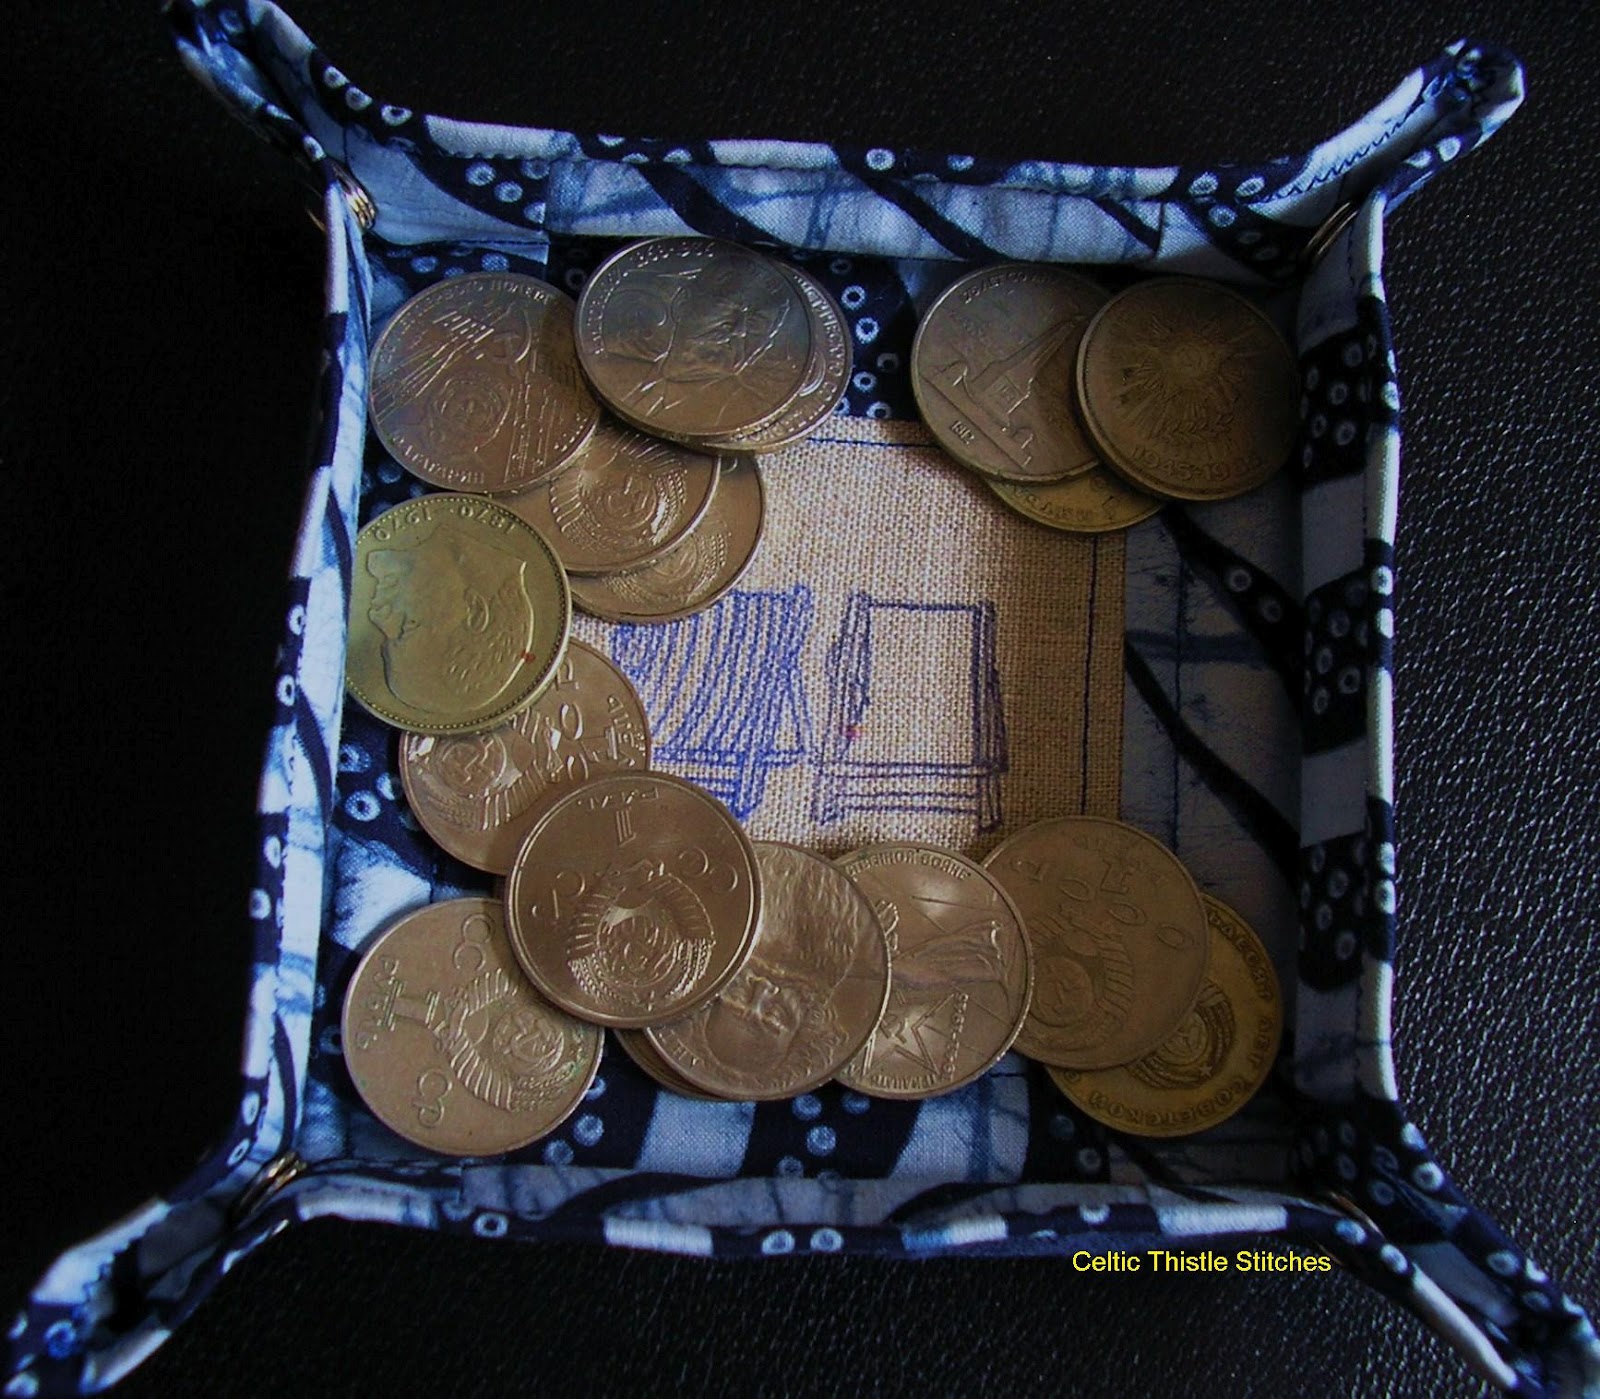
Either of these tools will come in handy for the tutorial I have put together for today's post. As regular readers will know, since living here in Riga we have taken every opportunity to travel around the region, so travel accessories are high on my list of useful projects. The project today, though, was inspired by a remark from our eldest son about wanting a leather travel coin tidy. Well, I thought why buy a soulless leather tray, when I could put together a more personal tray for him, so here it is.

The fabric is Box Cars purple by Echino and is available from the
Eternal Maker
Travel Coin/Key Tidy Tutorial
To make a Travel Coin/Key Tidy you will need the following;
Feature fabric - 1FQ (more if you use a directional fabric like the Box Cars)
Natural Linen - 6" x 6" square
Wadding - 10" x 10"
Heavy Sew-in Interlining 6" x 6" (I used Vilene Craft/Pelmet Sew-In)
4 10mm Press Fasteners/Studs (+ Press Stud Pliers if you have them)
Letter Stamps + Stamp Block
Ink Pad for fabric (Versamark and Stayzon inks are both recommended for fabric)
Cutting Instructions
From the natural linen cut one 4" x 4" square
From the feature fabric cut two 4" x 3" strips, two 9" x 3" strips, one square 10" x 10" and sufficient 1.5" strips to make at least 40" for binding
Step 1 : Stamping the Linen Centre
Protect your work surface with wastepaper. Arrange your letter stamps on the stamp block to spell out your chosen words or phrase. They will be reversed on the block. Ink the stamps with your chosen colours. Be reasonably generous with the ink as the linen fabric is fairly absorbent. If you are too generous you can clear up any excess ink on the stamps with a baby wipe!
Once you have stamped your fabric you will need to set it with a hot iron. (I used Versamark ink, check the manufacturer's instructions if you are using Stayzon inks)
Step 2 : Making the tray inner
Using 1/4" seams throughout attach the 4" x 3" strips of feature fabric to the 2 sides of the stamped linen square. When sewing with linen I usually stitch a second line of stitching inside the original seam allowance to help prevent fraying, but I err on the side of caution after a shop-bought linen log-cabin cushion cover came apart in the first wash!
Press seams to the side and attach the two 9" x 3" strips to the top and bottom of the linen square
Step 3 : Quilting the tray
Cut your heavy sew-in interlining to 5.5" square and baste to the centre of your pieced tray inner. Layer up your backing fabric, wadding and basted tray inner and baste all of the layers together. You will need to quilt straight lines 1.5" from each side of the pieced square, the length of each side. These lines will cross in each corner creating a ready-made guide for your press studs/fasteners later on. The remainder of the quilting of the tray is entirely up to you, make sure though that you quilt the heavy sew-in interlining as this will create the flat bottom for the tray. I chose to quilt around the stamped square and echo quilt around the square, but left the centre unquilted.
Trim the excess wadding and backing.
Step 4 : Binding
Sew your 1.5" strips together at right-angles to each other to make one continuous strip for binding. Fold the strip in half lengthways and press along the fold. I prefer to attach my binding to the front of the square by machine using a 1/4" seam and mitring the corners then folding over to attach by hand to the back, but you may prefer to machine stitch the binding completely. In which case, you will attach the binding by machine to the back off the quilted square and then fold over and attach to the front by stitching in the ditch through all layers.
Step 5 : Attaching the press fasteners
To make the quilted square into a tray that will fold flat for travel, you will need to add 4 press fasteners/studs, 1 to each corner.
Using the quilted lines you sewed earlier mark the halfway point on both sides of the corner. This is where you will fasten the studs. Each stud is comprised of 4 parts, two rings with hooks and 1 male and 1 female fastener.
You can see the individual parts in the photo above.
You will attach a hook ring on the exterior of the tray and 1 male fastener on the inner tray at the first mark and another hook ring and 1 female fastener on the opposite mark on the corner. The fasteners come supplied with a tool for fixing them to the fabric, which needs a hammer to exert the pressure needed to lock the hooks in the male and female fasteners. Alternatively, you can use eyelet/stud pliers.
Whichever method you are using you will place the hook ring in the lower arm and the male fastener with the back facing you in the upper arm.
Place the quilted tray between the two arms of the pliers or tool at the mark you made earlier and squeeze tightly together or hammer to lock the fastener in the tray.
Repeat at the mark on the other side of the corner with the female fastener in the upper arm. Do this at each corner of the tray making sure that you use a male and female fastener at each!
When you have attached each of the press fasteners, press them together and voila! You have a travel coin/key tidy!
Use whatever stamps you have to hand, these deckchair stamps came free with a magazine, and don't feel limited to using linen for the stamped centre, this coin/key tidy was made from an orphan block with a cotton centre.
I hope you have fun using this tutorial and thank you for making it this far!
Don't forget to check out my fellow Blog Hopper
Colby's sewing machine cover tutorial today too, and if you have missed them you can catch up on all the other posts in the Blog Hop
here. On Thursday the Blog Hoppers will be :
Mary from Spoolhardy Girl
Finally, huge thanks to
Beth who is responsible for organising the Blog Hop, she has put in a tremendous amount of work to put together such a wonderful array of bloggers. There is no shortage of inspiration and talent on display, and the Blog Hop certainly demonstrates all that attracted me to blogging in the first place, so it is a real privilege and pleasure to be able to take part.
I look forward to seeing travel tidies popping up in blogland soon and to meeting new readers as a result of this post.

 This side is for the action