Showing posts with label embroidery. Show all posts

Sunday, 16 May 2021

A Meandering Needle

 To mark the demise of our Embroiderers Guild Branch, the members were invited to swap stitched Artist Trading Cards. We were given a theme of "What the EG meant to me" and the dimensions but no other requirements. 

Being a member of the Embroiderers Guild has given me opportunities to try things with a needle and thread that I would never otherwise have had.


 I contributed to the Hardhome Embroidery for the launch of Game of Thrones Series 5 box set, (earning lots of kudos from my sons!)


entered an embroidery based upon a Hairy MacLary book into the national Page 17 exhibition,


made a fascinator for my daughter-in-law to wear to a friend's wedding and 


entered a local craft show competition with a canvaswork piece made for an exhibition and came 2nd! 

So, I decided that my theme for the ATC would be exploring stitches as that is what all of these opportunities have given me. 

I used a piece of a curtain fabric sample for the background of the ATC and gathered together some odds and ends to incorporate into the piece. My intention for the piece was to create an impression of a garden border of blowsy flowers on a lazy, late summer, sunny afternoon. 


As well as using stitches that I was already familiar with through the pieces I have previously created thanks to the Guild, such as French Knots and Chain Stitch, I also wanted to explore new to me stitches too. 

Having recently purchased Sharon Boggon's "Creative Stitches for Contemporary Embroidery" I didn't have far to look to find some new stitches to explore :)


 The green stitches climbing up the left of the card are Pistil Stitch, to suggest stems and seedheads bowing gently in the breeze. The open circle on the right hinting at an overblown flower is Padded Satin Stitch and the pink fronds of the fern like element in the middle is Up and Down Buttonhole Stitch. The pale pink flower shape you can just see in the top right is Whipped Long-Tail Chain Stitch. Can you tell that I really enjoyed letting my needle wander with these new stitches? 


So, this is my homage to the opportunities that membership of the Embroiderers Guild has provided me and to the many new experiences that I have enjoyed during my membership. Hopefully, the new textile art group that is planned to replace the Guild in my area will be just as stimulating and inspiring!


Tuesday, 30 March 2021

Small stitching

 Recently I have been enjoying myself with some new embroidery projects. I have long wanted to improve my free machine embroidery but never really known where to start :( However, a few months ago I had an opportunity to watch classes with  Wendy Dolan and Pat Archibald which were the perfect opportunity to kickstart that wanted improvement. 

As it happened I already had Wendy Dolan's book Layer, Paint and Stitch and just before lockdown last year had purchased a Pat Archibald kit, so having the chance to take a class with both of them (albeit remotely) was too good to miss. 


The Pat Archibald kit was called "Twilight on the Moor" and was really straightforward to do. As you can see it involved piecing the strips of fabric together and then some wavy line quilting to attach the pieced fabric to the backing. You can just see at the bottom of the piece the beaded embroidery embellishment. The kit also contained metallic foil and glue granules to add a bit of shimmer. I wasn't overly happy with how that turned out as it took a couple of attempts and the glue granules seemed to be concentrated in the same spot so the shimmer is not quite as light and random as I would have liked! Overall though I am pleased with it and would definitely give the metallic foils and glue granules another go. After I had completed this I came across a video tutorial in which Pat Archibald recommends using an old salt shaker for scattering the glue granules and I think that would probably have solved the problems I had with the granules clumping together.


It was possible to buy a kit for Wendy Dolan's class too but I decided to go with what I had on hand. The background is painted calico and the sea is free machine embroidery with various threads and scraps of organza. I really enjoyed having a go at this. I used a mix of metallic and polyester threads for the machine embroidery and scraps of whatever organza I could find. It was difficult at times to get the tension right with all of the different threads being used but I got there in the end. 


Here on the West Coast we are lucky enough to experience some amazing sunsets so I would like to have another go at these techniques with a palette similar to the above sometime.


Emboldened by the classes I have been using free machine embroidery in the Embroiderers Guild Artist Trading Card swap I am taking part in. The theme for the first one was January brings the Snow, and I used FME for the bare trees in the foreground.


February thaws the frozen ponds again was the theme for the second one. The ripples in the puddle are hand-embroidered with beads for the splashes and the boots and legs are Free Machine Appliqued. I really enjoyed this one :)


March brings breezes was the theme for the latest one. I could not get my head around this one for ages so it ended up being very last minute :) I had lots of ideas about dancing daffodil fairies but in the end went for a pieced background with a hand embroidered wind when I ran out of time! 

Whilst this swap was in progress the Embroiderers Guild pulled the rug out from under the membership by freezing all the Branch Bank Accounts and advising members that Branches would cease to exist! As you can imagine tensions ran high with legal challenges being proposed and petitions being set up. It has been an interesting few weeks :) 


Tuesday, 28 April 2020

Lighthouse love

Since the weather here recently has been lovely I have taken the opportunity to pick up (and finish!!) a project that has been on the go for I think 7 or maybe 8 years. (I checked back and it is only 6 years now I don't feel quite so bad!) In my defence it has always been something that I picked up in a spare moment rather than something I work on consistently. To be fair though I think that description could probably be applied to most of my projects if they don't have a deadline, and sometimes even when they do!

The kit had twelve lighthouse scenes printed on 9" blocks for embroidering. It was really difficult to take a photo of them all together so I am afraid this is the best that I could do.


 I bought this kit when we were on a cruise from Montreal to Miami in this quilt shop in Bar Harbor in Maine.


The fabric really needs pressing before I cut the blocks up ready for adding sashing. In a couple of places the blue embroidery lines have run though and I am worried that if I iron the blocks it might set the blue ink so it won't come out in the wash. If I wash the fabric before cutting I will lose the cutting lines. All advice welcome :)


Friday, 17 April 2020

Getting into Goldwork

This blog has been somewhat neglected of late but today I resolved to finally show you some of the things I have been up to.

Just before the world went into lockdown I was lucky enough to attend a Beginners goldwork class given by the extremely talented embroiderer, Liz Boulton. Liz had visited my EG group in the past so I knew that the class would be inspiring and it was!

This was the sample Liz showed us at the start of the class, amazing isn't it? Needless to say we were not expected to produce a piece quite as stunning as this in the Beginners class :)

We were given these silk fabric squares, which had already been machine stitch outlined by Liz, ready for us to add the individual goldwork motifs.

Liz had provided us with a kit containing all of the materials that we would need, so we were ready to go.

 First up, the Couched Purl and Padded Kid Spade. As you can see we cut out the spade motif from some felt and attached it to the fabric background. The felt shape is actually two felt motifs, one slightly smaller than the other, layered up largest on top. Then we traced half of the spade motif onto a piece of gold kid and attached it with small, stab stitches to cover one half of the felt. The line of kid in the middle of the felt is covered by a piece of pearl purl. The day was full of hitherto unknown stitching terms!


Alternating colours of purl were stitched down over the felt padding to cover the other half of the spade and the entire shape was outlined with stretched pearl purl.

It all sounds pretty straightforward but those little pieces of purl were pretty slippery to deal with :)

Next up we had a go at creating a couched circle. The aim of the stitching was to pack the lines of twist so closely together that you cannot see the background fabric through it but, as you can see, I didn't quite achieve that. I am happy with how it turned out as it was my first attempt at couching twist thread.


The third motif, the triangle, involved more couching, this time with a matching thread so that the couching is less obvious. We started at the top of the motif and worked our way down alternating between the two sides.

These three motifs were all started and some of them finished at the class.

The final motif, the Club, used techniques from the other stitching so, in theory, should have been more straightforward to complete.

I had the most trouble with this though, which is always the way isn't it when you are back home with no expert on hand to explain where you are going wrong!

I ripped out the kid covering the felt once, the pearl purl outlining the shape once and had several goes at the purl chips. So, what you see is far from perfect but as they say finished is better than perfect :)

 The final touch involved some trapunto quilting to fill out the tramlines around each motif.

I did really enjoy the class and my first attempts at goldwork and definitely intend to do more of it when I next get a chance.

Linking up to TGIFF at ChrisKnitsSews

Thursday, 18 October 2018

A Mackintosh Inspired TGIFF

Last weekend I attended the first of our Embroiderers Guild workshops for the coming year, which was on the theme of a homage to the Glasgow Architect and Designer Charles Rennie Mackintosh. It is now150 years since Mackintosh's birth, so there are lots of celebratory events being held in my part of the world.

Our tutor, Marjorie, brought along some examples of her work to kick start our creative process.

We were given lots of examples of Mackintosh designs to pick from for our own piece.I chose a flowing leaf design and then set to attempting to draw a pattern for my embroidery.

Next up we picked a piece of hand-dyed silk for the applique pieces.

We used our design and a lightbox to create the applique pattern pieces on Bondaweb.


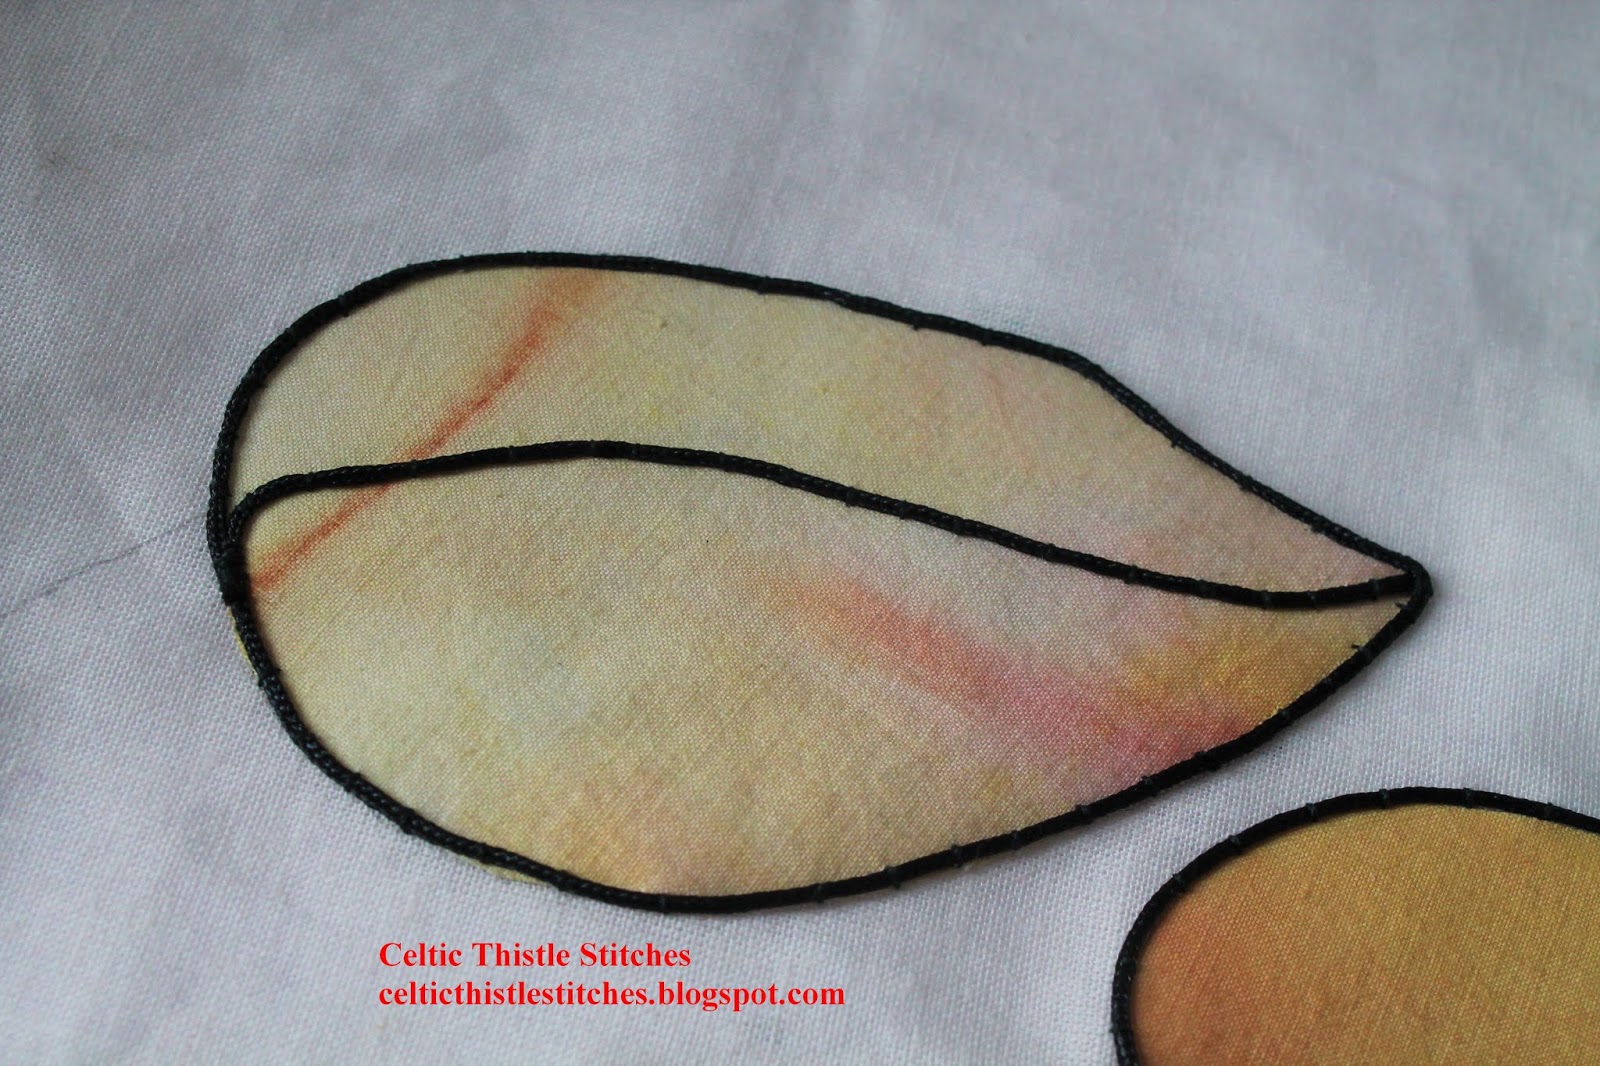
Once the applique pieces were applied we were ready to couch the cords. We had two thicknesses of cord to work with, so I chose to use the thinner cord to outline the leaves.


Then used the thicker cord for the leaf stems.

Once the embroidery was complete I felt that it was a bit flat so decided to add some beading to the piece.


I didn't want to detract from the clean, uncluttered lines of the piece so only stitched some beads between the stems.

And here is the finished piece ready to be stretched and framed!

So, that is my finish for TGIFF now it is your turn to link up and share your Friday finishes. As ever a bit of encouragement is always welcome so check out your fellow linkers and share some of the celebrations around. Include the TGIFF blog button in your post if you link up so that your followers can check them out too.


Thursday, 26 April 2018

Seashells on the seashore

Welcome to this week's TGIFF link party where I am delighted to share my latest finish with you.


I shared some of my progress on the Shoreline embroidery with the new stitches that I have tried in my recent New to Me post, so I am pleased to be able to share the whole embroidery with you as it is now finished (finally!).

The whole process of creating this piece has been a joy from start to finish and I have tried so many new techniques and stitches along the way.

I fell absolutely in love with the Spiders Web stitch, used to attach the button and sea glass above and also on its' own at the top left in blue.

There were lots and lots of French knots and quite a few buttonhole circles!

I had a lot of fun adding the buttons, pieces of sea glass and even the odd sequin to the embroidery as well as the shells I started out with.

Now I have to work out how to frame it!

Over to you now to link up your wonderful finishes this week. Share the celebrations by checking out your fellow finishers posts and give them a virtual pat on the back too :)


Wednesday, 25 April 2018

Stitches and Sealife

Welcome to this month's New to Me Link Party, where we celebrate the triumphs and disasters of trying out new and exciting things!


This month I have visited a New to Me place.


We visited the Bristol Aquarium with the gorgeous grandson and whilst he wasn't overly impressed with the fishy display, I was definitely inspired by the amazing textures of the coral and the colourful fish. I suppose when the Rays are as big as yourself it can be rather daunting :)

Sticking with the seaside theme I have also been exploring some new to me stitches in my Shoreline embroidery (yes I am still plugging away at that!).

First up Sorbello Stitch


next was Scroll Stitch , which was the perfect stitch for a wave don't you think.

I really like trying out new stitches in my embroidery projects and anything that replaces that old stalwart the French knot as a filler stitch is always a winner in my book!

So, that's my New to Me's for this month, now it is your turn to link up and show off the new techniques, patterns or anything else that you have tried out for the first time. As always, the link party will remain open until the end of the month, so if you have tried out something new but not yet blogged about it you still have plenty of time left. As Sandra can confirm the New to Me party accepts link ups right up to the deadline :)


Monday, 26 March 2018

Seashells on the Seashore

I recently attended a workshop given by the inspirational Toni Hanley. The theme for the workshop was Seashore and shells, so we were asked to bring along bits and pieces such as beads, buttons and shells to add to our embroideries.

Never having worked with shells in an embroidery before, they were the first of several New to Me's that I was introduced to in the workshop!


The first element of the piece to be made involved colouring some silk fabric with paint.

We wrapped the plain silk fabric around a plastic cup and tied it tightly with cotton thread then painted over the scrunched up fabric with silk paint and left it to dry.

Then we cut up pieces of Tyvek, a definitely New to Me fabric, before attacking them with an iron and heat gun. I discovered that Tyvek, which is used in the making of items as diverse as envelopes and housewrap (!), is a favourite of mixed media artists, due to its capacity to warp and bubble when heated whilst retaining sufficient softness to allow for stitching through it.

This is what happens to those flat pieces of Tyvek after they have come into contact with a hot iron!

A dab of silk paint later and they were also left to dry.

Next up bonding Angelina Fibres with the iron to create a shimmering piece of fabric. Another New to Me too :)

Finally we ironed some painted Bondaweb to a piece of felt and covered it with a layer of iridescent film, as you have probably guessed another New to Me, and we were all set to start embroidering.

A couple of happy hours later and I had this to show for my day. The darker pieces are the painted Tyvek and the long piece at the top of the silk is a silk cocoon that has been teased out and painted.

I absolutely loved working on this and have been stitching away on it every chance I get ever since so, hopefully, will have a finished piece to show you in the not too distant future.

So, that's my New to Me's this month, now it is over to you to link up what you have been up to for the first time in March. As always, the link will remain open until the end of the month so you still have time to give that technique a whirl that you have been pondering about for a while :) Don't worry either if things didn't quite go as planned, we are all about the triumphs and tribulations here and who knows maybe someone else has had the same problems as you and knows a great fix. So share those New to You's with your fellow bloggers who are always up for anything that will extend their creative boundaries!


If you have some finishes in the pipeline there are still some host spots available for the TGIFF link party in the coming weeks, sign up here and maybe tick another New to You off that list!

Friday, 22 September 2017

A walk in the park!

Several months ago the Embroiderers Guild sent out a request for contributions to a forthcoming exhibition to be based around books. The exhibition would be called Page 17, although the solicited exhibits could be based upon anything to do with a book not just the 17th page. The exhibits would be on display at the Knitting and Stitching shows in Harrogate and London and, it was hoped, would also travel to other venues later in the year.

Existing works that might suit the theme were to be submitted by the end of April for consideration and a deadline of the end of August was set for exhibits created specifically for the exhibition. At the time I think this distinction created some confusion as I saw several comments on how little time there was to submit a piece. Undaunted I sent off an email to say that I was interested in submitting a new piece and then started thinking ... and thinking ... and thinking :)

You will not, I am sure, be surprised to know that I finally finished my piece for the exhibition the day before the submission deadline!


When our boys were little one of their favourite books was Lynley Dodd's Hairy Maclary from Donaldson's Dairy, and now it is a favourite of our gorgeous grandson too. So, I decided to have some fun with the characters in the book for my embroidery. I knew that my drawing skills were not up to reproducing the characters exactly so decided to show bits of them as if they were being seen through holes in the fence.

Each of the dogs in the book has an accompanying description, so Muffin McLay is like a bundle of hay.

My Muffin McLay is a bit curly for hay but I think he is still recognisable! I used a New to Me stitch for Muffin, drizzle stitch, which is apparently Brazilian in origin. It was great fun to stitch and is definitely a great addition to my stitching repertoire.

I stitched all of the dogs, apart from Hairy Maclary, on to a cotton backing fabric then joined the sky and fence fabric together to place over the top before adding Hairy Maclary and the fence and tree detail.

I spent a while trying to work out how best to deal with the cut-outs for the embroidery and finally used another New to Me technique.


Spray starch sprayed into the aerosol lid

then painted on to the seam allowance of the circle cut-outs and ironed in place before being placed in front of the embroidered cotton. To my surprise it worked!

I wanted Hairy Maclary to stand proud of the rest of the embroidery so used wool on canvas and another New to Me stitch, Turkey Stitch, to create his fluffy self. (Apologies for the somewhat blurred photo I was running out of time when I took it!)

I was very pleased with how it all turned out and when the piece has finished travelling it will be another addition to the gallery on the gorgeous grandson's wall!

If you haven't read the books the characters are from the left;

  • Schnitzel von Krumm with a very low tum
  • Muffin McLay like a bundle of hay
  • Bitzer Maloney all skinny and bony
  • Bottomley Potts covered in spots
  • Hercules Morse as big as a horse
and Hairy Maclary from Donaldson's Dairy :)

 Linking up to Crazy Mom Quilts

Stitchery Link Party Button
Related Posts Plugin for WordPress, Blogger...